Why Your Laser Engraver Might Not Be Working?
Laser engravers have revolutionized various industries, allowing businesses and hobbyists to create intricate designs on various materials precisely and easily. However, like any complex machinery, laser engravers can encounter issues that prevent them from functioning correctly. If you find yourself in a situation where your laser engraver is not working as expected, this article aims to guide you through potential reasons and troubleshooting steps to get it back on track.
Usually, laser engraving issues stem from the following problems:
Power Supply Problems
The first thing to check when your laser engraver is not working is its power supply. Ensure the device is correctly plugged into a working electrical outlet and the power switch is turned on. If your laser engraver has an emergency stop button, ensure it is not engaged, as it can disrupt the machine's functionality.
Laser Tube Issues
The laser tube is the heart of a laser engraver, and if it's malfunctioning, the machine won't operate correctly. Check the laser tube for any physical damage, such as cracks or leaks. Additionally, verify that the tube's water-cooling system is functioning correctly, as an overheated tube can lead to performance issues. Make sure to follow the manufacturer's recommendations regarding the maintenance and replacement of the laser tube.
Testing the Output Power of the Laser
is crucial to test its output power. This can be done by following a simple yet effective detection method:
Open and Dismantle the Control Box: Before proceeding, ensure the laser engraver is safely disconnected from its power source. Carefully open the control box according to the manufacturer's instructions, allowing access to the internal components.
Replace the Laser Cable Socket: Locate the laser cable socket, which connects the module to the control board. Disconnect and replace the existing cable socket with a suitable testing cable socket.
Power On the Machine: Once the replacement cable socket is in place, power on the laser engraver as you normally would.
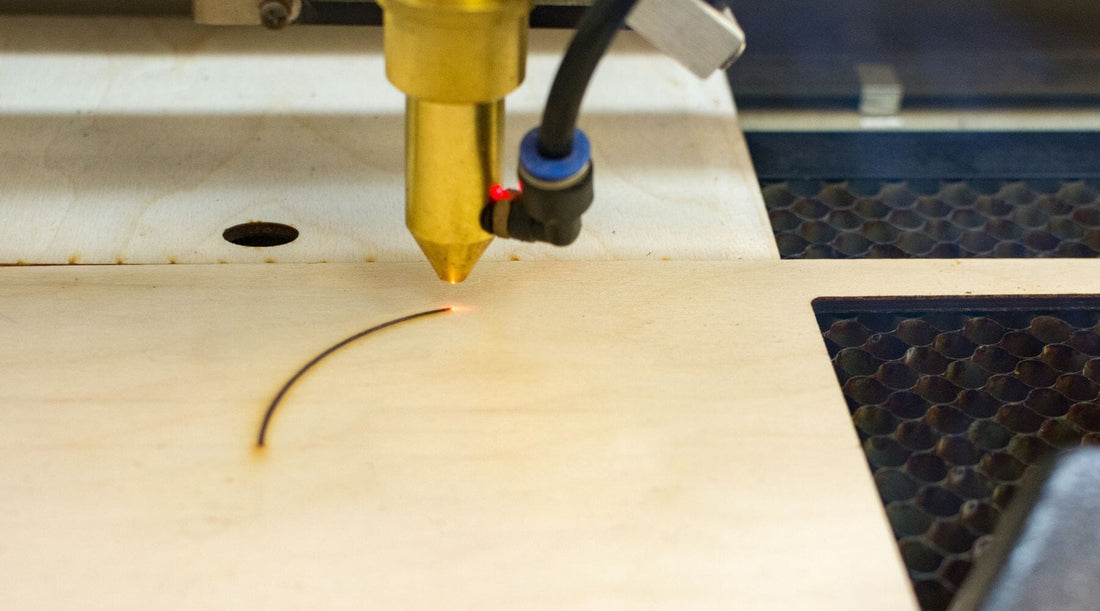
Perform the Laser Power Test: Position a 3mm thick piece of wood approximately 2mm away from the laser nozzle. Activate the engraving process and observe the wood's reaction to the laser beam.
Addressing Laser Failure
If the laser fails the power test, there is likely an issue with the module itself. Several factors could contribute to the laser's failure, such as a damaged laser tube, faulty power supply, or misaligned optics. It is recommended to seek professional assistance or consult the manufacturer's support team to address these issues.
Safety Considerations
Safety should be the top priority when conducting any tests or troubleshooting procedures on a laser engraver. Always ensure the engraver is disconnected from its power source before opening the control box or making any internal adjustments. Additionally, wear appropriate protective gear, including safety glasses, to shield your eyes from laser beams.
Conclusion
It can be frustrating when your laser engraver isn't working, but it's important not to freak out. Most of the time, you can figure out and fix the problem with some simple troubleshooting. Start by checking the power supply, laser tube, optics, exhaust, and ventilation systems. Make sure you're using the right materials and settings for your project. Also, keep your software and firmware up-to-date and ensure all safety features are working properly.
If you encounter a problem you can't solve on your own, don't hesitate to contact the manufacturer's customer support or consult with experienced professionals. Taking good care of your engraver will help you fix issues and make it last longer and work better, so you can keep making amazing art and products with precision and ease.
Discover the Fascinating World of Laser Engraving - Click the Link to Browse and Subscribe!
https://www.wizmaker.com/
